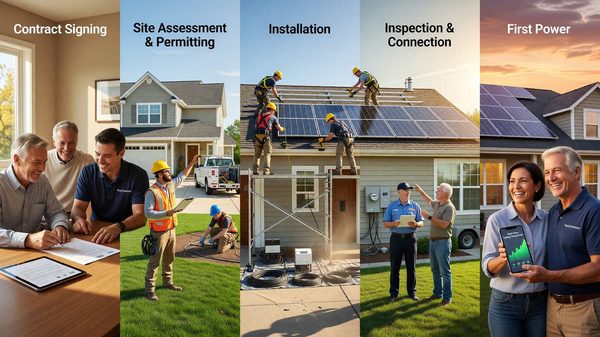
Most homeowners go into a solar project with a vague picture of “panels on the roof” and very little sense of the eight to twelve weeks of sequenced work that actually produce a running system. The install day itself is often the shortest part of the timeline. This guide walks through each phase in the order it happens, with the questions you should be asking at every step.
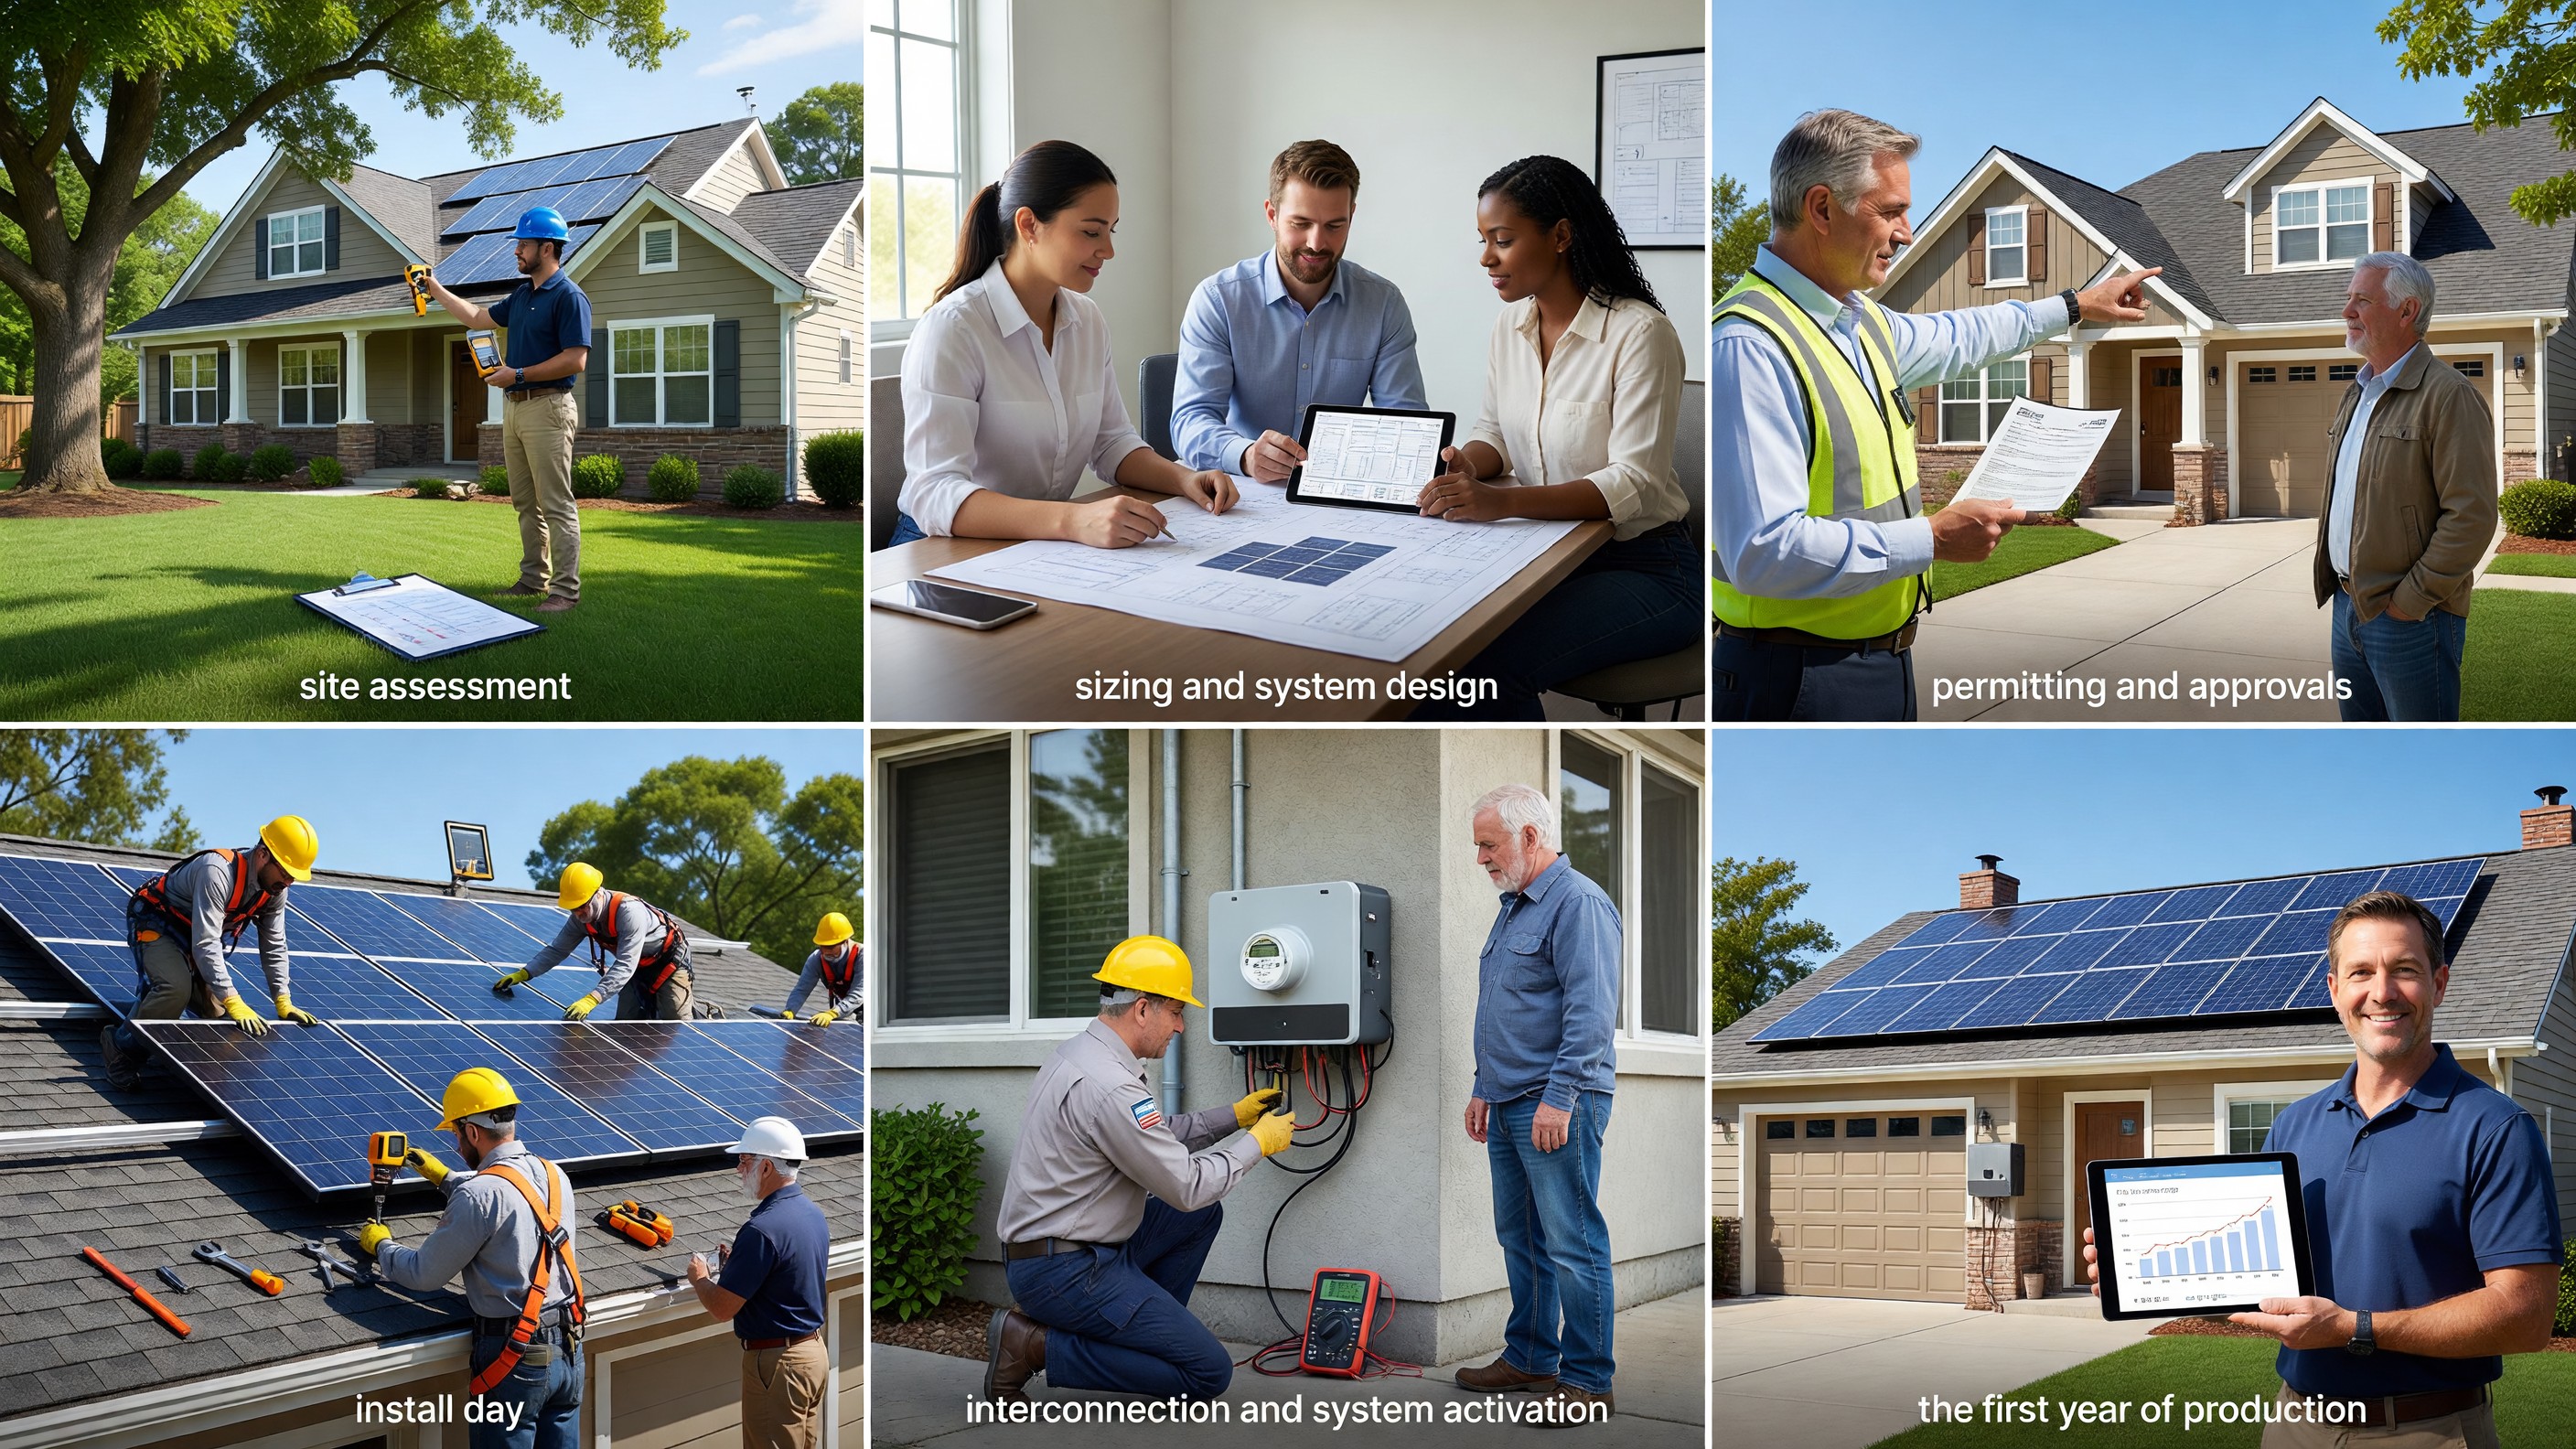
1. Site Assessment and Shading Analysis
Before any equipment is specified, a competent installer should evaluate your roof and the surrounding solar window. A modern site assessment usually combines:
- Satellite analysis — most installers start with Google Project Sunroof, Aurora Solar, or a similar tool to get a first-pass estimate of usable roof area and annual insolation.
- On-site measurement — roof pitch, azimuth (which direction each plane faces), obstructions (vents, chimneys, dormers), and structural condition.
- Shading analysis — using a Solmetric SunEye, a drone, or LIDAR-based software to model how trees, neighboring buildings, and parts of the roof itself shade the array across the year. The shading tool reports a Total Solar Resource Fraction (TSRF) or Solar Access percentage; anything above 85% is generally considered very good for residential PV.
The output of this phase is a preliminary array layout with an estimated annual production figure in kWh. Cross-check that figure against NREL’s free PVWatts Calculator — it’s the same model the industry uses, and it takes about three minutes to run yourself.
2. System Sizing: The kWh Math
System size is driven by your electricity consumption, not by your roof area (unless your roof is the limiting factor). Pull twelve months of utility bills and sum the kWh — that’s your annual consumption. A typical U.S. single-family home runs between 8,000 and 14,000 kWh per year, with regional variation. The EIA’s Residential Energy Consumption Survey breaks this down by state and home type.
To size the system:
- Take annual kWh consumption (say, 11,000 kWh).
- Divide by the production ratio for your location — typically 1,200 to 1,600 kWh per kW of installed capacity per year, depending on latitude, weather, and roof orientation. PVWatts gives you a precise number.
- The result is your target system size in kW DC.
For 11,000 kWh in a location with a 1,400 kWh/kW production ratio, the math is 11,000 / 1,400 ≈ 7.9 kW. Most installers will round up slightly to allow for panel degradation and account for some load growth (EVs, heat pumps).
Do not oversize. In most net metering jurisdictions, you receive less than full retail credit for excess production exported to the grid, and some utilities cap system size at 100% to 110% of historical consumption.
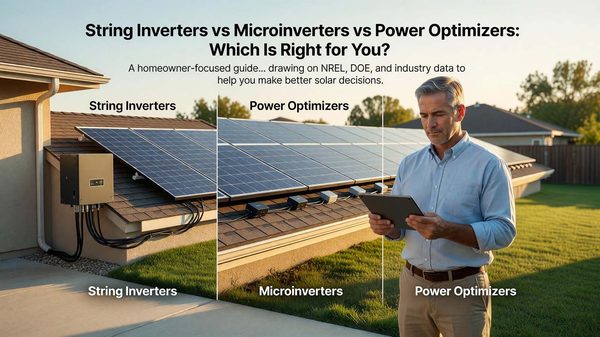
3. String Inverters vs Microinverters
Once size is set, the next architectural decision is the inverter topology. Two dominant approaches in 2026:
- String inverters with DC optimizers (e.g., SolarEdge): one central inverter in the garage or on an exterior wall, with a small optimizer behind each panel. Lower equipment cost. Module-level monitoring. Single point of failure at the inverter, which typically needs replacement once over the system’s 25-year life.
- Microinverters (e.g., Enphase): one microinverter behind each panel, doing the DC-to-AC conversion at the module. Higher equipment cost (roughly $0.10–$0.20 more per watt). Better performance on roofs with partial shading or mixed orientations. No single point of failure. Longer warranties (typically 25 years vs 10–12 for string inverters).
For a simple south-facing roof with no shading, a string + optimizer setup is often the cost-effective choice. For complex roofs, multiple planes, or any meaningful shading, microinverters generally produce more energy over the system’s life. This is also the right place to think about future battery storage — both architectures support batteries, but the pairing differs.
4. Permitting, Utility Application, and HOA
This is the phase that drags timelines out. Three parallel approvals are required:
- Building/electrical permit from your municipality. Required documents typically include a structural letter (or engineer-stamped drawings if your roof is borderline), single-line electrical diagrams, and a site plan. Turnaround ranges from same-day in SolarAPP+ jurisdictions to six weeks in slower cities.
- Utility interconnection application. Your installer files this with the local utility. Approval includes a review of system size against your meter capacity and may require a meter upgrade. This is often the longest step — four to eight weeks is common.
- HOA approval if applicable. Many states (including California, Texas, Florida, and Arizona) have solar access laws that limit HOA authority to deny installations, but HOAs can still impose reasonable aesthetic conditions. Submit early.
Your installer should handle all three on your behalf. Ask up front who the named applicant is and how progress will be communicated.
5. Installation Day
The physical install is usually one to three days for a residential system. A typical sequence:
- Day 1 (morning): Crew arrives, stages equipment, sets up fall protection. Racking attachment points are marked, lag bolts are driven into rafters, and flashing is installed under each attachment to maintain the roof’s weatherproofing.
- Day 1 (afternoon): Rails are mounted, panels are carried up and secured. On microinverter systems, the inverters are mounted to the rails before the panels.
- Day 2: Electrical work — DC and AC wiring runs, conduit, the inverter (if string), the rapid shutdown device, the production meter, and the new breaker in your main panel. A consumption monitoring CT is clamped around the main service conductors.
By the end of installation, the system is physically complete but not energized. It cannot be turned on until the utility says so.
6. Inspection and Interconnection
Two final approvals are needed before the system runs:
- Municipal inspection of the electrical and structural work. Failures are usually minor (labeling, conduit support, breaker placement) and corrected in a day or two.
- Utility Permission to Operate (PTO). Once the city signs off, the utility schedules a meter swap (if needed) and issues PTO. This can take anywhere from a few days to several weeks depending on the utility.
When PTO arrives, your installer (or you) flips the AC disconnect and DC switches. The system begins producing immediately on the next sunny daylight period.
This is also the moment your eligibility for the federal solar tax credit clarifies — “placed in service” for IRS purposes generally means PTO is in hand. See our federal solar tax credit guide for how to document the date.
7. Monitoring Setup
Almost every modern system comes with a monitoring portal — Enphase Enlighten, SolarEdge mySolarEdge, Tesla app, etc. During commissioning, make sure:
- You can log in to the portal yourself, not just the installer.
- Each panel (microinverter systems) or each string (string systems) is reporting.
- Consumption monitoring is enabled if installed — this lets you see net export and self-consumption, not just production.
- Alerts are configured for production drops or device offline events.
The first week of data is the most useful diagnostic period in the system’s life. Glance at it daily. If a panel or microinverter is dead on arrival, you want to catch it now.
8. First-Year Performance Expectations
A correctly sized and well-sited system should hit within ±5% of the PVWatts estimate over the first full calendar year, with the largest deviations driven by weather variability. Expect:
- Year-over-year degradation of 0.4% to 0.7% — this is the panel manufacturer’s published linear degradation rate, and it’s borne out in long-running NREL field studies.
- Seasonal swing of 3–5× between peak summer month and trough winter month for most U.S. latitudes.
- Snow and soiling losses of 2–5% annually in most climates. You generally do not need to clean residential panels manually.
If your annual production comes in 15% or more below the PVWatts estimate after accounting for actual weather, something is wrong — call your installer and have them investigate before the workmanship warranty window closes.
For the ROI math that translates this production into dollars, see our solar ROI calculation guide.
Frequently Asked Questions
How long does the full process take from contract to PTO? Eight to sixteen weeks is typical. Permitting and utility interconnection are usually the slowest phases. The physical install itself is one to three days.
Do I need to be home during the install? For most of it, no — but you should be available on day one to walk the crew through the property and on the final commissioning day to confirm monitoring access.
Will the panels damage my roof? A properly flashed install does not damage a roof and often extends the life of the area underneath. If your roof is more than 15 years old, consider replacing it before solar — removing and reinstalling panels later costs $1,500–$3,000.
Can I add a battery later? Yes. Both string and microinverter architectures support battery retrofits. Adding a battery in a later year gets its own 30% federal tax credit.
What if a panel breaks? Most module warranties run 25 years. The installer’s workmanship warranty (usually 10–25 years) covers the labor to swap a failed panel. The monitoring portal should flag the failure long before you notice it on your bill.